4.2 ICRC-1 tokens
Overview
For developers to create their own fungible tokens on the Internet Computer, the ICRC-1 token standard can be used. The acronym "ICRC" stands for "Internet Computer Request for Comments", as the standard was created by the Internet Computer working group. Learn more about the working group.
Standards defined within the ICRC group are not specific to tokens; anything can be standardized using an ICRC standard. Some examples may be the standardization of metadata fields or digital assets other than tokens.
The purpose of the ICRC-1 standard is to create a universally accepted standard for creating and recording token transactions on the Internet Computer. The ICRC-1 standard defines the general functionalities of ledgers; any tokens and their corresponding ledgers that want to support the ICRC-1 standard must fulfill all requirements within the standard. View a detailed account of the standard.
There are several extensions of the ICRC-1 standard, such as the ICRC-2 standard. Not all ICRC standards must be extensions of the ICRC-1 standard, though. This tutorial will focus on the ICRC-1 standard, ICRC-1 ledger, and briefly look into the ICRC-2 standard's endpoints.
What's the difference between the ICP and ICRC-1 ledgers?
The ICP ledger is a specific implementation of a ledger, which initially did not follow a standard. The ICP ledger existed prior to the ideation and creation of the ICRC-1 standard.
ICRC-1 is an official standard and is not a specific implementation of a ledger. There are several different ICRC-1 ledgers with different implementations, but all follow the same standard.
The ICP and ICRC-1 ledger use different endpoints, different transactions, different block objects, in addition to other subtle differences.
Accounts versus AccountIdentifiers?
The most important difference between the ICP ledger and the ICRC-1 standard is their implementation of accounts. The ICRC-1 standard specifies Accounts as a struct data type that contains a principal and an optional subaccount.
type Subaccount = blob;
type Account = record { owner : principal; subaccount : opt Subaccount; };
In contrast, the ICP ledger uses AccountIdentifiers to represent accounts, which are essentially a hash of the ICRC-1 Account value.
An Account can be converted into an AccountIdentifier, but an AccountIdentifier cannot be converted into an Account. This factor provides the ICP ledger with a level of anonymity, though it means the ICP ledger cannot have the same internal representation as an ICRC-1 ledger.
Endpoints
The ICP ledger implements all ICRC-1 endpoints, but is not an implementation of an ICRC-1 ledger due to the ICP ledger's use of AccountIdentifiers.
Index canisters
If you want to find information about a transaction for a specific Account or AccountIdentifier, you could query all of the transactions within the ICP or ICRC-1 ledger, then parse through the transaction records for the results you're looking for. If you're querying a local ledger canister, the transaction history may not be very long and this process may have low latency. However, if you're using the mainnet ledgers, parsing the transaction history may be a hassle.
As an alternative, an index canister can be queried. The index canister provides an endpoint for querying the transaction list for a specific account, as well as other information such as an account's current balance. Since the ICP and ICRC-1 ledgers use different account representations (Account and AccountIdentifier), the ICP and ICRC-1 index canisters do not use the same endpoints.
On the mainnet, the ICP index canister runs on the NNS subnet and has the canister ID qhbym-qaaaa-aaaaa-aaafq-cai.
There are several ICRC-1 compatible ledgers, and in turn several ICRC-1 index canisters. One example is the ICRC-1 ledger for ckBTC transactions, which has the canister ID n5wcd-faaaa-aaaar-qaaea-cai.
Extensions of the standard
The ICRC-1 standard intentionally excludes certain ledger functions that are necessary for building diverse DeFi applications, such as:
Transaction notifications for smart contracts.
An interface and structure for fetching blocks.
Pre-signed transactions.
The ICRC-1 standard defines the icrc1_supported_standards endpoint to accommodate these functions through extensions of the standard. This endpoint returns all specifications implemented by the ledger, such as ICRC-2 or DIP-20.
Metadata
The ICRC-1 token standard allows for several optional metadata fields to be specified. Metadata can be used to help improve the user experience and simplify the token's integration with wallets. Each metadata key is an arbitrary Unicode string that uses the format <namespace>:<key>, where the namespace icrc1 is reserved for metadata defined for the ICRC-1 standard. Metadata entries include:
icrc1:symbol: The token's currency code, such asvariant { Text = "XTKN" }.icrc1:name: The token's name, such asvariant { Text = "Test Token" }.icrc1:decimals: The number of decimals used by the token, such asvariant { Nat = 8 }icrc1:fee: The token's default transfer fee, such asvariant { Nat = 10_000 }.
Deploying a ICRC-1 ledger locally
Deploying an ICRC-1 ledger canister locally uses the same steps that you used in the last module to deploy the local ICP canister, but you'll use different Wasm and Candid files.
Prerequisites
Before you start, verify that you have set up your developer environment according to the instructions in 0.3 Developer environment setup.
Creating a new project
To get started, create a new project in your working directory. Open a terminal window, navigate into your working directory (developer_journey), then use the commands:
- dfx v0.17.0 or newer
- dfx v0.16.1 or older
Use dfx new <project_name> to create a new project:
dfx start --clean --background
dfx new icrc1_ledger_canister
You will be prompted to select the language that your backend canister will use. Select 'Motoko':
? Select a backend language: ›
❯ Motoko
  Rust
  TypeScript (Azle)
  Python (Kybra)
Then, select a frontend framework for your frontend canister. Select 'No frontend canister':
  ? Select a frontend framework: ›
  SvelteKit
  React
  Vue
  Vanilla JS
  No JS template
❯ No frontend canister
Lastly, you can include extra features to be added to your project:
  ? Add extra features (space to select, enter to confirm) ›
⬚ Internet Identity
⬚ Bitcoin (Regtest)
⬚ Frontend tests
Then, navigate into the new project directory:
cd icrc1_ledger_canister
dfx start --clean --background
dfx new icrc1_ledger_canister
cd icrc1_ledger_canister
Remember, by default dfx new creates a new project in the Motoko language. If you'd like to create a Rust project, use the flag --type=rust.
Locating the Wasm and Candid files
You can access the Wasm and Candid files in the same way that you located the ICP ledger files. Remember that you'll need the latest replica version, which can be found on the dashboard under the Elect new replica binary revision field.
Then, use the following URL to download the Wasm module: https://download.dfinity.systems/ic/<VERSION>/canisters/ic-icrc1-ledger.wasm.gz. In this tutorial you'll use the URL https://download.dfinity.systems/ic/d87954601e4b22972899e9957e800406a0a6b929/canisters/ic-icrc1-ledger.wasm.gz.
Use the following URL can be used to download the Candid file: https://raw.githubusercontent.com/dfinity/ic/<VERSION>/rs/rosetta-api/icrc1/ledger/ledger.did. In this tutorial, you'll use the URL https://raw.githubusercontent.com/dfinity/ic/d87954601e4b22972899e9957e800406a0a6b929/rs/rosetta-api/icrc1/ledger/ledger.did.
Open the dfx.json file in the project's directory and replace the existing content with the following:
{
  "canisters": {
    "icrc1_ledger_canister": {
      "type": "custom",
      "candid": "https://raw.githubusercontent.com/dfinity/ic/d87954601e4b22972899e9957e800406a0a6b929/rs/rosetta-api/icrc1/ledger/ledger.did",
      "wasm": "https://download.dfinity.systems/ic/d87954601e4b22972899e9957e800406a0a6b929/canisters/ic-icrc1-ledger.wasm.gz",
    }
  },
  "defaults": {
    "build": {
      "args": "",
      "packtool": ""
    }
  },
  "output_env_file": ".env",
  "version": 1
}
Next, you'll use the minter identity you created in the last module, 4.1 Using the ICP ledger. If you need to export the minter identity's principal again, run the commands:
dfx identity use minter
export MINTER_ACCOUNT_ID=$(dfx ledger account-id)
The environment variable MINTER_ACCOUNT_ID is the principal ID responsible for minting and burning tokens.
Then, export the name and symbol of your token:
export TOKEN_NAME="Dev Journey Token"
export TOKEN_SYMBOL="DJTK"
The environment variable TOKEN_SYMBOL is the token's ticker symbol, and the TOKEN_NAME variable is the token's full name.
Then, set the identity that you want to use to deploy the ledger. In the previous module 4.1 Using the ICP ledger, you used the DevJourney identity, which you'll use again:
dfx identity use DevJourney
export DEPLOY_ID=$(dfx identity get-principal)
It is recommended to mint some tokens when the ledger is deployed so that you can interact with the ledger and send tokens to other identities. To do this, set an amount of PRE_MINTED_TOKENS and a TRANSFER_FEE:
export PRE_MINTED_TOKENS=10_000_000_000
export TRANSFER_FEE=10_000
The environment variable PRE_MINTED_TOKENS is the number of tokens minted during the ledger's initial deployment. These are held by the account that deploys the ledger canister.
The environment variable TRANSFER_FEE is the fee that users will pay whenever they make a transfer using the ledger.
Next, set the values for the ledger's archiving options. The values you're setting in this tutorial are the recommended values, but you can alter them to fit your project's needs:
dfx identity new archive_controller
dfx identity use archive_controller
export ARCHIVE_CONTROLLER=$(dfx identity get-principal)
export TRIGGER_THRESHOLD=2000
export NUM_OF_BLOCK_TO_ARCHIVE=1000
export CYCLE_FOR_ARCHIVE_CREATION=10000000000000
In these commands, the following environment variables are set:
ARCHIVE_CONTROLLER: Principal of the archive canister's controller.TRIGGER_THRESHOLD: The number of blocks to archive once the trigger threshold is exceeded.NUM_OF_BLOCK_TO_ARCHIVE: The amount of blocks to be archived.CYCLE_FOR_ARCHIVE_CREATION: The amount of cycles to be sent to the archive canister when it is deployed.
Then, specify which standard(s) you want your ledger to support. For example, to support just the ICRC-1 standard, set the FEATURE_FLAGS to false:
export FEATURE_FLAGS=false
The FEATURE_FLAGS is used to enable or disable certain ICRC-1 standard extensions. If you want to support the ICRC-2 standard extension, then set this flag to true:
export FEATURE_FLAGS=true
Now, let's deploy the ICRC-1 ledger canister locally using the environment variables that you've set using the command:
dfx deploy icrc1_ledger_canister --specified-id mxzaz-hqaaa-aaaar-qaada-cai --argument "(variant {Init =
record {
     token_symbol = \"${TOKEN_SYMBOL}\";
     token_name = \"${TOKEN_NAME}\";
     minting_account = record { owner = principal \"${MINTER}\" };
     transfer_fee = ${TRANSFER_FEE};
     metadata = vec {};
     feature_flags = opt record{icrc2 = ${FEATURE_FLAGS}};
     initial_balances = vec { record { record { owner = principal \"${DEPLOY_ID}\"; }; ${PRE_MINTED_TOKENS}; }; };
     archive_options = record {
         num_blocks_to_archive = ${NUM_OF_BLOCK_TO_ARCHIVE};
         trigger_threshold = ${TRIGGER_THRESHOLD};
         controller_id = principal \"${ARCHIVE_CONTROLLER}\";
         cycles_for_archive_creation = opt ${CYCLE_FOR_ARCHIVE_CREATION};
     };
 }
})"
Specifying the canister ID as mxzaz-hqaaa-aaaar-qaada-cai is an optional step that is used in this tutorial for consistency.
Deploying a ICRC-1 ledger on the mainnet
To deploy an instance of the ICRC-1 ledger on the mainnet, there are several important things to note:
You will need to remove the argument
--specified-id mxzaz-hqaaa-aaaar-qaada-cai, since you will receive a unique canister ID when the canister is deployed.You will need to use the argument
--network icto specify deploying to the mainnet.You can specify the amount of initially minted tokens by setting
initial_values = vec {<INITIAL_VALUES>}.Always set the
archive_optionsfield, otherwise the ledger's capacity is limited to the memory of a single canister.Assure that the ledger canister has sufficient cycles, since it will require cycles to create new instances of the archive canister on demand.
Interacting with the ICRC-1 ledger
Like the ICP ledger, the ICRC-1 ledger can be interacted with using the dfx canister command or the Candid UI. You can also use the ic-cdk for making inter-canister calls to the ICRC-1 ledger or the ledger-icrc-js library. This tutorial will cover using dfx canister and the Candid UI, and provide resources for the ic-cdk and ledger-icrc-js options.
Using the dfx canister command with ICRC-1 endpoints
This tutorial will cover the endpoints for the ICRC-1 ledger canister and the endpoints for the ICRC-2 extension. For the ICRC-2 endpoints, you will need to have set FEATURE_FLAGS=true in the previous step before the canister was deployed.
To confirm that your local canister supports the ICRC-2 extension, you can check the list of supported standards with the command:
dfx canister call icrc1_ledger_canister icrc1_supported_standards '()'
This should return the following output:
(
  vec {
    record {
      url = "https://github.com/dfinity/ICRC-1/tree/main/standards/ICRC-1";
      name = "ICRC-1";
    };
    record {
      url = "https://github.com/dfinity/ICRC-1/tree/main/standards/ICRC-2";
      name = "ICRC-2";
    };
  },
)
To get the token symbol of the ICRC-1 ledger, use the command:
dfx canister call icrc1_ledger_canister icrc1_symbol '()'
This command returns:
("DJTK")
To return the token's decimals of the ICRC-1 ledger, use the command:
dfx canister call icrc1_ledger_canister icrc1_decimals '()'
This command returns:
(8 : nat8)
To return the token's metadata of the ICRC-1 ledger, use the command:
dfx canister call icrc1_ledger_canister icrc1_metadata '()'
This command returns:
(
  vec {
    record { "icrc1:decimals"; variant { Nat = 8 : nat } };
    record { "icrc1:name"; variant { Text = "Dev Journey Token" } };
    record { "icrc1:symbol"; variant { Text = "DJTK" } };
    record { "icrc1:fee"; variant { Nat = 10_000 : nat } };
    record { "icrc1:max_memo_length"; variant { Nat = 32 : nat } };
  },
)
To return the total token supply of the ICRC-1 ledger, use the command:
dfx canister call icrc1_ledger_canister icrc1_total_supply '()'
This command should return the amount of tokens that you minted using the PRE_MINTED_TOKENS variable:
(10_000_000_000 : nat)
To return the token's transfer fee of the ICRC-1 ledger, use the command:
dfx canister call icrc1_ledger_canister icrc1_fee '()'
This command returns:
(10_000 : nat)
To return the minting account principal of the ICRC-1 ledger, use the command:
dfx canister call icrc1_ledger_canister icrc1_minting_account '()'
This command returns:
(
  opt record {
    owner = principal "rrd6e-uoar3-ehz42-jxkun-ymmmv-jw4rn-re7se-5hymk-aoizl-bfb3j-uqe";
    subaccount = null;
  },
)
To fetch the balance of an account, in this tutorial the DEPLOY_ID account, use the command:
dfx canister call icrc1_ledger_canister icrc1_balance_of "(record {owner = principal \"${DEPLOY_ID}\"; })"
Since you haven't transferred any tokens, this command returns the amount that you minted in the PRE_MINTED_TOKENS variable:
(10_000_000_000 : nat)
To transfer tokens using the ICRC-1 ledger, use the following command:
dfx canister call icrc1_ledger_canister icrc1_transfer "(record { to = record { owner = principal \"sckqo-e2vyl-4rqqu-5g4wf-pqskh-iynjm-46ixm-awluw-ucnqa-4sl6j-mqe\";}; amount = 10_000;})"
This command uses the DEPLOY_ID account principal to transfer 10_000 tokens. The output of this command will return:
(variant { Ok = 1 : nat })
Using ICRC-2 endpoints
The ICRC-2 standard enables the approve-transfer-from pattern that became popular in the Ethereum ecosystem with the ERC-20 token standard. It specifies a way for an account owner to delegate token transfers to a third party, usually a canister, on the owner's behalf.
For example, to approve 100_000 tokens for the principal sckqo-e2vyl-4rqqu-5g4wf-pqskh-iynjm-46ixm-awluw-ucnqa-4sl6j-mqe, you can use the command:
dfx canister call icrc1_ledger_canister icrc2_approve "(record { amount = 100_000; spender = record{owner = principal \"sckqo-e2vyl-4rqqu-5g4wf-pqskh-iynjm-46ixm-awluw-ucnqa-4sl6j-mqe\";} })"
This command will return the block index of the transaction, such as:
(variant { Ok = 2 : nat })
Then, to confirm that this command worked correctly, you check the principal's allowance by running the command:
dfx canister call icrc1_ledger_canister icrc2_allowance "(record { account = record{owner = principal \"${DEPLOY_ID}\";}; spender = record{owner = principal \"sckqo-e2vyl-4rqqu-5g4wf-pqskh-iynjm-46ixm-awluw-ucnqa-4sl6j-mqe\";} })"
This command should reflect the 100_000 tokens you approved previously:
(record { allowance = 100_000 : nat; expires_at = null })
An expiration date can be sent for the approval, such as:
dfx canister call icrc1_ledger_canister icrc2_transfer_from "(record { amount = 90_000; from = record{owner = principal \"${DEPLOY_ID}\"}; to= record{owner = principal \"${DEPLOY_ID}\"}; })"
This command will return the block index of the transaction, such as:
(variant { Ok = 3 : nat })
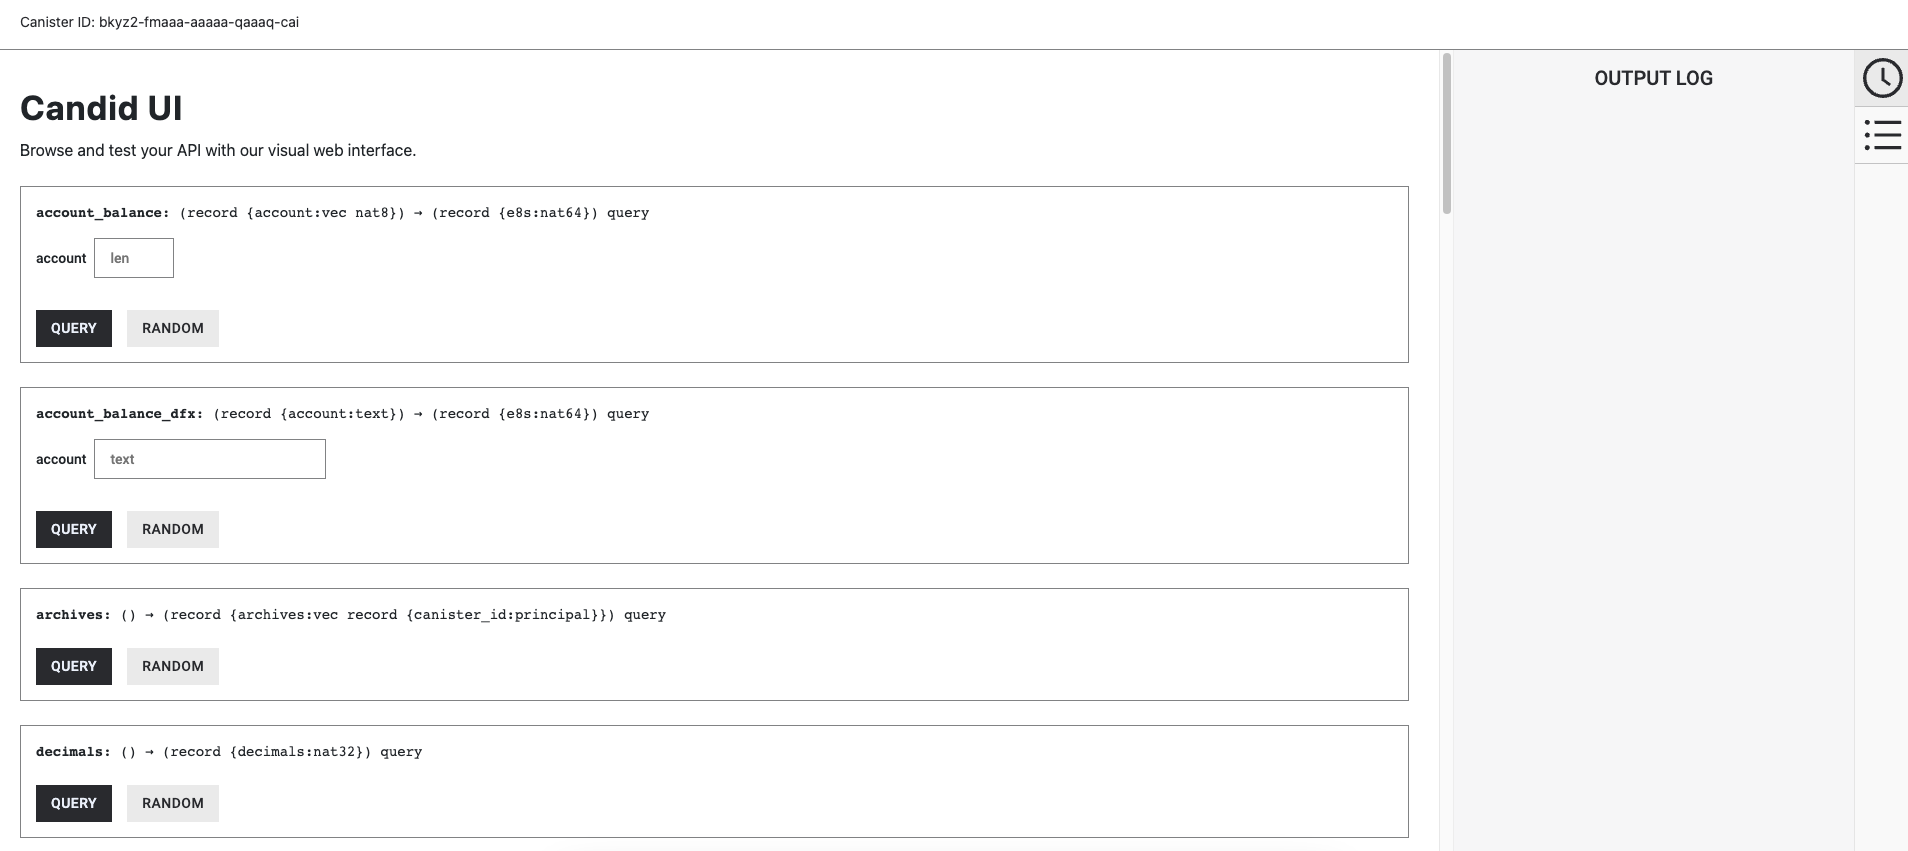
Using the Candid UI
To interact with the ICRC-1 ledger using the Candid UI, navigate to the URL provided when the canister was deployed. If you specified the canister ID when the canister was deployed, this URL will be:
http://127.0.0.1:4943/?canisterId=bnz7o-iuaaa-aaaaa-qaaaa-cai&id=mxzaz-hqaaa-aaaar-qaada-cai
This URL will display the following Candid UI:
Resources
Need help?
Did you get stuck somewhere in this tutorial, or feel like you need additional help understanding some of the concepts? The ICP community has several resources available for developers, like working groups and bootcamps, along with our Discord community, forum, and events such as hackathons. Here are a few to check out:
Developer Discord community, which is a large chatroom for ICP developers to ask questions, get help, or chat with other developers asynchronously via text chat.
Motoko Bootcamp - The DAO Adventure - Discover the Motoko language in this 7 day adventure and learn to build a DAO on the Internet Computer.
Motoko Bootcamp - Discord community - A community for and by Motoko developers to ask for advice, showcase projects and participate in collaborative events.
Weekly developer office hours to ask questions, get clarification, and chat with other developers live via voice chat. This is hosted on our developer Discord group.
Submit your feedback to the ICP Developer feedback board.
Next steps
Next, you'll dive into ckBTC: