4.5 Using quill
Overview
Now that you've covered both the ICP ledger and the NNS, it's time to take a look at a CLI tool that can be used to interact with both. Quill is a ledger and governance toolkit that provides support for self-custody of ICP or ckBTC tokens and functionality to interact with the NNS, SNSs, and ICP ledger from a cold wallet.
To hold tokens or digital assets, there are three types of wallet options you can use:
Centralized wallet services: A wallet service owned and operated by a centralized third-party, such as a centralized exchange. On a centralized wallet service, the user is not in control of the wallet's private key.
Hot wallets: Any wallet that uses an application on a device connected to the internet. With hot wallets, users are in full control of their wallet's private key.
Cold wallets: A wallet that uses an offline device that is not connected to the internet. Like hot wallets, cold wallets also provide users with full control of the wallet's private key.
Each of these options has their benefits, but there is an equal tradeoff between convenience and security. For example, while cold wallets are quite secure since they do not have access to the internet and are safe from malicious cyber attacks, it is not convenient to use since there must be additional steps taken to move the assets to a hot wallet or centralized wallet in order to spend and trade the assets. The opposite is true for hot wallets; while they are convenient to use, they are susceptible to attacks.
Read more about different types of self-custody wallet options in the documentation.
In this tutorial, you'll take a look at how to use quill for workflows like interacting with the ICP ledger, sending or receiving ckBTC, and interacting with the NNS and neurons.
What is quill?
Quill is a CLI tool used for interacting with ICP's governance and ledger canisters. A unique feature of quill is the ability to create signed messages on an offline computer, or a 'cold wallet'. Once these messages are created, they must be transferred to an online computer, however, in order for them to take effect on the mainnet. Since the Internet Computer uses cryptographically verifiable messages, messages can be created on an offline computer then transmitted to ICP on a computer connected to the internet, since ICP will accept the message no matter how it was created.
To support cold wallets, quill uses two steps to send query and update calls to ICP. First, quill is used with different subcommands to generate and sign messages based on the subcommand's inputted parameters and arguments. This step does not require connection to the internet. Then, in the second step the signed messages are sent to ICP, which does require an internet connection. To connect to the internet, users will need to transport the signed messages from the cold wallet computer to another computer using a USB stick or a QR code.
While it is important to know that quill supports cold wallet workflows, quill can also be used on a computer connected to the internet without using any cold wallet workflows.
Transactions that use query requests, such as obtaining an account's balance or returning proposal information, require an internet connection and cannot be run on cold wallets. This is because submitting these query calls locally would not be beneficial, since the mainnet canisters being queried are not running on the local replica. Additionally, query calls do not require the same cryptographic validity that update calls do, therefore they do not need a signature to be generated and can be submitted directly to the mainnet.
In this tutorial, you'll see that query calls do not generate output and can be submitted directly to the mainnet, while update calls will generate a JSON response that must be saved and submitted using quill send.
Downloading and installing quill
To install quill on a cold wallet, you can either follow the steps below then disconnect the computer from the internet, or you can download the release file and transport it to the offline machine using a device such as a USB flash drive.
In this tutorial, it will be assumed that you will be using quill on a machine with an internet connection, but this tutorial will include notes with information for cold wallet workflows.
First, start by downloading the latest quill release from GitHub.
This tutorial will showcase the MacOS steps; please see the instructions here for Linux and Windows.
Then, move the file to the /usr/local/bin directory to use it in the CLI:
mv quill-macos-x86_64 /usr/local/bin/quill
Next, give the file executable permissions:
chmod +x /usr/local/bin/quill
Check that quill is now available for use by running the command:
quill -h
Using quill's basic commands
First, you need an account to use with quill. You can create a new account, or you can use an existing ledger account. To create a new account, generate the account's private key by running the command:
quill generate
This command will return the principal and account IDs for our newly generated private key:
Principal id: hzpq4-g6feu-vbvwx-oeo5c-fjiz4-de4bq-7q4y2-rldok-whjrq-mnayv-mqe
Legacy account id: 438f6fdc8e33539bbf73625c141cfbfa4b41fd943595f8e1ccd0b8c9e9758772
Alternatively, you can use a private key file for our existing ledger account with an ICP balance. To use an existing ledger account, you will need the account's .pem file. To get this .pem file, you can use the dfx identity export command. First, assure that you're using the dfx identity you intend to be:
dfx identity whoami
Then, export the identity's .pem file with the command:
dfx identity export default > identity.pem
In this command, the > character indicates that you want to save the output of dfx identity export default to a file called identity.pem.
Then, you can pass this .pem file into our quill commands with the flag --pem-file identity.pem.
Next, let's use quill to get our account's balance. Use the following command:
quill --pem-file identity.pem account-balance PRINCIPAL_ID
Replace PRINCIPAL_ID with the principal value returned from the command dfx identity get-principal for the identity that you generated the .pem file for.
Running commands with quill will generate the transaction, then ask if you'd like to send the message or not, such as:
Sending message with

  Call type:   update
  Sender:      2vxsx-fae
  Canister id: ryjl3-tyaaa-aaaaa-aaaba-cai
  Method name: icrc1_balance_of
  Arguments:   (
  record {
    owner = principal "hzpq4-g6feu-vbvwx-oeo5c-fjiz4-de4bq-7q4y2-rldok-whjrq-mnayv-mqe";
    subaccount = null;
  },
)

Do you want to send this message? [y/N]
This subcommand, account-balance, cannot be run on offline machines, so selecting 'N' will cancel the request. Selecting 'Y' will query the mainnet for the result, which will be returned such as:
Request ID: 0x7c8e03ccaa28ad463cd568cc52b14d5c7739fa81039d4548e34818e333d5e752
The request is being processed...
The request is being processed...
The request is being processed...
(100_000_000 : nat)
Now, if you want to transfer ICP to another account, you can use the command:
quill --pem-file identity.pem transfer --amount AMOUNT ACCOUNT_ID
To use the quill transfer command, you need to have a balance of ICP. ICP can be bought through a crypto exchange, or ICP can be received through community activities such as participating in the NNS governance and receiving developer grants.
Replace AMOUNT with the numerical number of how many ICP tokens to transfer and replace ACCOUNT_ID with the account ID that should receive the ICP. For example:
quill --pem-file identity.pem transfer --amount 0.5 365cf45f3521653e866a078b157a8d8701c3f63183a6d41ff8ddb913c4a978d3
This command will output the transaction's JSON content. This content can be saved to a file then submitted as a transaction such as:
quill --pem-file identity.pem transfer --amount 0.5 365cf45f3521653e866a078b157a8d8701c3f63183a6d41ff8ddb913c4a978d3 > transfer_transaction.json
quill --pem-file identity.pem send transfer_transaction.json
Then you'll be prompted to confirm sending this transaction to the mainnet. On a cold wallet, the transaction1.json file can be transferred to an online machine to be sent with the quill --pem-file identity.pem send transfer_transaction.json command.
Using quill with ckBTC
Quill can be used to create transactions for interacting with ckBTC. To get started, check the ckBTC balance of your ledger account with the command:
quill ckbtc balance --of PRINCIPAL_ID
Replace PRINCIPAL_ID with the principal ID for the identity you want to use.
Like the account-balance command, the quill ckbtc balance command cannot be run on offline machines, so selecting 'N' will cancel the request. Selecting 'Y' will query the mainnet for the result, which will be returned such as:
Request ID: 0xbdeef0e77df3c032b9c63d5c0e08aa766bfb33d81ab2b5f783ce0c7eafdccb58
The request is being processed...
The request is being processed...
(0 : nat)
Then, to retrieve BTC in exchange for ckBTC use the command:
quill ckbtc retrieve-btc WITHDRAW_ADDRESS --satoshis AMOUNT > retrieve_transaction.json
Replace PRINCIPAL_ID with your principal ID, and replace AMOUNT with the number of Satoshis to retrieve.
Then, to submit this transaction, run the command:
quill send retrieve_transaction.json
The output confirming the transaction will resemble the following:
Sending message with

  Call type:   update
  Sender:      2vxsx-fae
  Canister id: mxzaz-hqaaa-aaaar-qaada-cai
  Method name: icrc1_transfer
  Arguments:   (
  record {
    to = record {
      owner = principal "mqygn-kiaaa-aaaar-qaadq-cai";
      subaccount = opt blob "\0e\b6\de\93\b1y\ae\83+\b3\22\e8\e3\d6\84f0\04E\cb=\e5\b8\afy\bb\8dL\bc\ea\96\d0";
    };
    fee = null;
    memo = null;
    from_subaccount = null;
    created_at_time = opt (1_697_834_874_304_780_000 : nat64);
    amount = 1_000 : nat;
  },
)

Do you want to send this message? [y/N]
With quill, you can also transfer ckBTC to another address with the command:
quill ckbtc transfer PRINCIPAL_ID --satoshis AMOUNT > ckBTC_transfer_transaction.json
Then, to submit this transaction, run the command:
quill send ckBTC_transfer_transaction.json
The output confirming the transaction will resemble the following:
Sending message with

  Call type:   update
  Sender:      2vxsx-fae
  Canister id: mxzaz-hqaaa-aaaar-qaada-cai
  Method name: icrc1_transfer
  Arguments:   (
  record {
    to = record {
      owner = principal "hzpq4-g6feu-vbvwx-oeo5c-fjiz4-de4bq-7q4y2-rldok-whjrq-mnayv-mqe";
      subaccount = null;
    };
    fee = null;
    memo = null;
    from_subaccount = null;
    created_at_time = opt (1_697_835_095_032_290_000 : nat64);
    amount = 1_000 : nat;
  },
)

Do you want to send this message? [y/N]
Using quill with the NNS
Quill can be used with both the NNS and any SNS that has been launched on ICP.
In the previous module, 4.4 NNS governance and staking, you took a look at how to interact with the NNS and neurons through the NNS dapp. Now, let's look at how to use quill instead to perform the same functions.
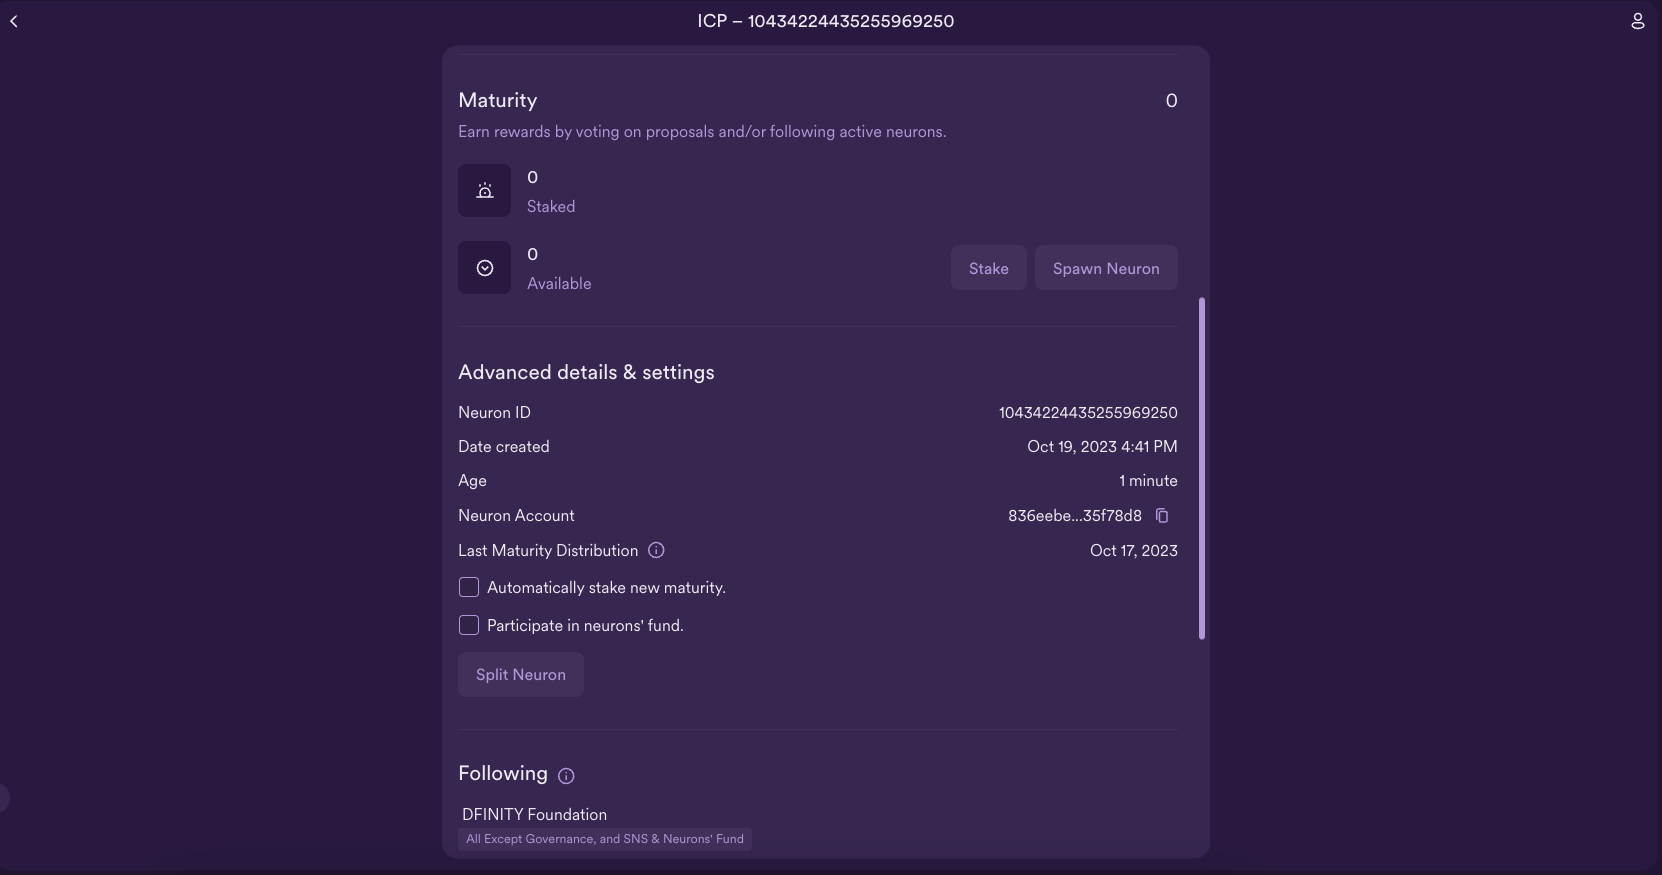
First, let's get some information about a neuron. You'll need a neuron's ID, which you can find on the NNS dapp, as you took a look at in the last module:
Then, you can use the command:
quill get-neuron-info NEURON_ID
Replace NEURON_ID with the ID of a neuron. Since this command is a query command, it cannot be run on offline machines, so selecting 'N' will cancel the request. Selecting 'Y' will query the mainnet for the result, which will be returned such as:
Request ID: 0xf8fa04049bb2d0f968203e008427301f8a6d49018c50647d44f26eabf0fdd114
The request is being processed...
The request is being processed...
The request is being processed...
The request is being processed...
(
  variant {
    Ok = record {
      dissolve_delay_seconds = 252_383_885 : nat64;
      recent_ballots = vec {};
      created_timestamp_seconds = 1_697_751_704 : nat64;
      state = 2 : int32;
      stake_e8s = 200_000_000 : nat64;
      joined_community_fund_timestamp_seconds = null;
      retrieved_at_timestamp_seconds = 1_697_835_643 : nat64;
      known_neuron_data = null;
      voting_power = 399_939_067 : nat64;
      age_seconds = 0 : nat64;
    }
  },
)
Now, to get a list of all neurons that belong to your identity's principal, run the command:
quill --pem-file identity.pem list-neurons > list_neurons.json
Then, submit the command with:
quill send list_neurons.json
To manage a neuron and make a configuration change to it, you can use the command:
quill --pem-file identity.pem neuron-manage NEURON_ID <arguments>
For a full list of arguments to use with this command, use quill neuron-manage --help for the full list. For example, to start dissolving a neuron, run the command:
quill --pem-file identity.pem neuron-manage NEURON_ID --start-dissolving > manage_neuron.json
Then, submit the command with:
quill send manage_neuron.json
To stake ICP in a neuron, you can use the quill neuron-stake command:
quill --pem-file identity.pem neuron-stake --amount AMOUNT --name NAME > stake_neuron.json
Replace AMOUNT with the amount of ICP to stake in the neuron, and replace NAME with the name of the neuron.
Then, submit the command with:
quill send stake_neuron.json
Lastly, quill can be used to get information about the NNS's current proposals. For example, to list currently pending proposals, run the command:
quill list-proposals --limit 3
The --limit command is used to limit how many are returned; in this command the most recent 3 proposals are returned. Since this command is a query command, it cannot be run on offline machines, so selecting 'N' will cancel the request. Selecting 'Y' will query the mainnet for the result, which will be returned such as:
 record {
        id = opt record { id = 125_319 : nat64 };
        status = 1 : int32;
        topic = 8 : int32;
        failure_reason = null;
        ballots = vec {
          record {
            14_315_117_116_521_128_082 : nat64;
            record { vote = 0 : int32; voting_power = 197_278_881 : nat64 };
          };
        };
        proposal_timestamp_seconds = 1_697_817_106 : nat64;
        reward_event_round = 0 : nat64;
        deadline_timestamp_seconds = opt (1_698_162_706 : nat64);
        failed_timestamp_seconds = 0 : nat64;
        reject_cost_e8s = 1_000_000_000 : nat64;
        derived_proposal_information = null;
        latest_tally = opt record {
          no = 12_288_248_589_007 : nat64;
          yes = 90_977_820_988_843 : nat64;
          total = 45_249_721_684_450_311 : nat64;
          timestamp_seconds = 1_697_837_007 : nat64;
        };
        reward_status = 1 : int32;
        decided_timestamp_seconds = 0 : nat64;
        proposal = opt record {
          url = "";
          title = opt "Upgrade Nns Canister: 3r4gx-wqaaa-aaaaq-aaaia-cai to wasm with hash: 538efcf1a59b8cfbfa2d665681bb269068011c8b46564b57143f41fbf7b1aa01";
          action = opt variant {
            ExecuteNnsFunction = record {
              nns_function = 4 : int32;
              payload = vec {};
            }
          };
          summary = "# Upgrade SNS aggregator canister to commit `eeefa5e413aab9e005063cc4fcefef28ee37139f`\nWasm sha256 hash: `538efcf1a59b8cfbfa2d665681bb269068011c8b46564b57143f41fbf7b1aa01` (`sns_aggregator.wasm.gz`)\n\n## Change Log\n\n* Updated libraries provided by the `ic` repository to `release-2023-06-07_23-01`.\n\n## Commit Log\n\n```\n+ bash -xc \"git log --format=\'%C(auto) %h %s\' 05982aef6..eeefa5e41 ./rs/sns_aggregator/\"\n e61e92223 GIX-1935: Add fields SNS aggregator (#3533)\n d9c1647ec Use Principal instead of candid::Principal (#3452)\n a531d848c Robust traits (#3442)\n d98bee949 Smaller patch (#3440)\n 6d545dd1b Update sns_aggregator IC cargo dependencies to release-2023-06-07_23-01 (#3407)\n 8aa4329ee Bump snsdemo (#3396)\n 28fb107e2 Snsdemo update (#3369)\n```\n\n## Wasm Verification\n\nTo build the wasm module yourself and verify its hash, run the following commands from the root of the [nns-dapp repo](https://github.com/dfinity/nns-dapp):\n\n```\ngit fetch  # to ensure you have the latest changes.\ngit checkout \"eeefa5e413aab9e005063cc4fcefef28ee37139f\"\n./scripts/docker-build\nsha256sum sns_aggregator.wasm.gz\n```\n";
        };
        proposer = opt record { id = 36 : nat64 };
        executed_timestamp_seconds = 0 : nat64;
      };
To get detailed information about this proposal, take the value id = opt record { id = 125_319 }, in this case 125319, and input it into the get-proposal-info subcommand:
quill get-proposal-info 125319
Resources
Need help?
Did you get stuck somewhere in this tutorial, or feel like you need additional help understanding some of the concepts? The ICP community has several resources available for developers, like working groups and bootcamps, along with our Discord community, forum, and events such as hackathons. Here are a few to check out:
Developer Discord community, which is a large chatroom for ICP developers to ask questions, get help, or chat with other developers asynchronously via text chat.
Motoko Bootcamp - The DAO Adventure - Discover the Motoko language in this 7 day adventure and learn to build a DAO on the Internet Computer.
Motoko Bootcamp - Discord community - A community for and by Motoko developers to ask for advice, showcase projects and participate in collaborative events.
Weekly developer office hours to ask questions, get clarification, and chat with other developers live via voice chat. This is hosted on our developer Discord group.
Submit your feedback to the ICP Developer feedback board.
Next steps
To finish the level 4 developer journey section, you'll wrap up with Motoko level 4: